Hi there. I wouldn't ever imagine that one day I would write about dual boot until I encounter an ever unimaginable problem. People surely know what dual booting is, but to repeat briefly, dual booting is partitioning a disk into more than one partition and installing multiple OSes. Of course, only one OS can run at the same time.
In earlier times, when I have initially heard about Linux, we used to shrink disk partitions with FIPS and install linux on the partition we just created. After virtual machines became widespread, I began to use dual booting less often because it was more practical for me to run a second OS virtually. Moreover, after I started using SSD, I was worried about disk wear-out since an OS is always used less than another, but I never had a problem. After finally buying my second computer with a good price, dual boot was (almost) no longer required, until I had to install Windows 7 for some tests, recently.
Dual boot is actually pretty easy. Almost any OS on separate partitions can be booted using a good boot loader. So far, everything looks easy but new computers require a few extra steps to install an OS under UEFI because a separate EFI boot partition needs to be created. In this article, my aim is to install two OSes while utilizing the disk in the most efficient way, I can. I have done this installation on my physical machine before, but since I don't want to reinstall everything, I will use a VM, this time.
The operating systems will be Fedora 33 and Win 7, but I also installed Win 10. The steps are pretty much the same anyway. I prefer to keep linux /boot directory, in a separate partition because I use LVM for linux. This is just a habit but not a must. Besides /boot, I will create one partition for each OS.
Additional reading:
Additional reading:
Is a /boot partition necessary anymore?
Is a /boot partition always necessary?
What's your recommendation on drive partitioning ... ?
Having this said, as of Fedora 33, the default file system is now btrfs. At the end of this article, I wrote a section about btrfs. I will not use btrfs for this installation and explained the reasons at the end.
Creating the Virtual Machine
I used VMware Workstation v15.5 for virtualization (not sure if VirtualBox can run EFI properly). The VM must have at least two cores and more than 2 GB of RAM, otherwise weird errors might show up. In Vmware ESXi Lab article, I explained how to create a VM, so I will only mention the some steps.
 I created the machine with "Custom (advanced)" option and selected "I will install the operating system later". Guest operating system will be Windows 7 x64. This enables UEFI option at "Firmware type" screen (next figure). In case UEFI option is greyed out here, open the .vmx file after the machine is created and change the line starting with firmware as firmware = "efi". If this line doesn't exist, add the whole statement, close vmware workstation window and reopen it. For Win10, "Windows 10 x64" must be selected. As far as I know, there is no 32-bit Win 10 (Edit: there is). I did not understand, why there are "Windows 10" and "Windows 10 x64" options in VMware.
I assigned two cores (or two sockets) as CPU and 3072 MB as RAM. 2 GB is minimum recommended for Win 7, as long as it does not exceed the physical memory available (blue triangle), the more memory the VM has, the more reliable it runs. Network connection will be NAT and IO controller "LSI Logic SAS". Even though Win 7 supports "LSI Logic", too, Win 10 does not (vmware doesn't allow you to select). The wizard recommends NVMe disk for Win 10 but since I don't know the impact on this configuration, I chose SCSI (btw. Fedora can be installed on NVMe disk). I created a 120 GB SCSI disk. I did not check "Allocate all disk space now" because I don't have that much free space on my physical disk. At this point, I completed the wizard and created the machine.

Partitioning the Disk
Partitioning is the first thing to give attention. I have the following options: Since Fedora 32, KDE is running problematically in VM. Therefore, before booting the VM with KDE, 3D graphics acceleration must be turned off in VM display settings (Source: KDE spin issues in VMWare).
The problem with disk partitioning is that Windows setup wants to create an EFI partition by itself. Therefore, it is necessary to leave approx. 256 MB unpartitioned space on disk. 128 MB of this, is EFI partition. There is another 100 MB hidden partition created by the setup, supposedly used for temp files or as recovery partition. If only 128 MB is left, 100 MB of this will be used for EFI partition and the hidden partition will not be created. For Win 10 installation, a 100 MB EFI partition is created with a 16 MB hidden partition. So, leaving 128 MB for Win 10 is enough.
 To partition the disk, I booted the VM with ubuntu and started gparted (using ubuntu is optional, check the third item above. I explained same procedure with KDE partition manager below). I made sure that the correct disk is selected at the top right (especially for physical machines). First, I created a 'gpt' type partition table by clicking Create Partition Table item under Device menu. Then I right-clicked on the gray rectangle representing the empty disk and clicked New afterwards. I gave 1024 as "New size" and created first partition.
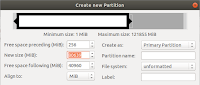 I clicked New again and gave 41216 to "Free space following" and 256 to "Free space preceding" (after entering this value, "Free space following" will drop to 40960. For Win 10, the initial value should be 40960+128=41088). As file system, I selected "unformatted" from the bottom of the list and created the second partition. Finally, I created a NTFS partition in the remaining space. There will be an unallocated 1 MB at the end of the disk, this is normal. At this point, the partitions should look like this:

I pressed the green tick button and wrote the partitions to the disk. By the way, while creating the partitions, the order is important. For example, if I had created the third partition before the second, the third partition (40 GB) would be sda2 since it would be in the second entry on GPT, and the second partition (78.75 GB) would be sda3. It is quite confusing that the partitions are numbered according to their entries on GPT instead of their location on disk.
After partitioning, I created volume groups and logical volumes for linux. I run following commands on console:
I created this template for my own needs and left 5.75 GB free space in volume group intentionally, to assign in case it's needed in future. If I wanted to add all remaining free space to lv_var, I should run:
Same thing can be done using KDE partition manager: I boot the VM with Fedora KDE, start partition manager from Applications -> System -> KDE partition manager and select the disk to partition from the left pane. Then, I click "New Partition Table" button above and select "GPT". I create a 1024 MB partition first (like above), then the second partition with 256 MB of preceding unpartitioned space and followed by 40960 MB of unpartitioned space and finally, third NTFS partition in the remaining space.

Fully partitioned disk can be seen above. I press Apply to write this to disk and create logical volumes for linux with the commands in the box above.
Installing Operating System #1: Windows
The order of installation of OSes is the second important point to give attention. I haven't tried with Windows 10 but Win XP and Win 7 always overwrite existing boot loader. GRUB will be overwritten with Windows MBR code if linux is installed first. Therefore I have to start with installing Windows.
I booted the VM with Win 7 DVD. In the meantime, I disconnected from network. I suppose, it tries to connect to internet for updates during the installation, which takes time. For physical installation, image file can be written to USB stick with UNetbootin or UUI. Additionally, while installing Win 7 to bare metal, my IR mouse and keyboard, which are normally recognized by Win 7 successfully, caused setup to crash. Therefore, it is better to remove them before installation.

I completed the installation by selecting "Custom (Advanced)" at the "Type of installation" step and selecting the third partition at the disk selection step.

I won't go into details of steps such as username, password etc.
During Windows 10 installation, product key will be asked. I skipped this by pressing "I don't have a product key". Those, who are considering to buy a license, need to choose a suitable edition at next step. The editions ending with "N", don't contain some programs as per EU laws, but it's nearly impossible to find license for them. I chose Win 10 Pro, but it doesn't matter for me because in fact, I am just installing a temporary VM. Like Win 7 installation, "Custom Install" needs to be selected and the third partition will be the installation target.
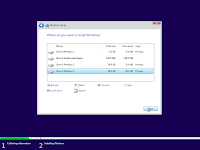
And again, I will not go into details, as the rest are just personal settings.
Installing Operating System #2: Linux
Before everything, there is one thing to be careful about physical machines. Linux must be booted in 64-bit UEFI mode. How will this happen?
For example, GRUB menus in Fedora are a little different between 32 and 64-bit modes. If the menu is in color, it is IA32, if it's without color then it is x64 mode.
When I plug the USB stick with Fedora into my computer and restart, this USB disk appears twice in BIOS boot options. The right option can be found by trying or opening EFI shell and running BOOTX64.EFI manually. In VMware, it always boots in to correct mode without doing anything.
As it can be seen from the images above, I prefer KDE. Once Fedora has booted, just click "Install to Hard Drive" for installation. The best thing with live distro setups is being able to run other programs in the background during installation and if you have more than one monitor, you can browse the Internet at the same time while installation is running on the other monitor. By the way, I had turned the network connection off before Windows installation. This time, I will turn it on. Otherwise, I will need to configure network manually after the installation.
 Right after starting the installation, I chose language, time zone etc. The only important thing here is disk partitions. To configure disks, I clicked "Installation Destination" and selected "Custom" under "Storage Configuration". Then I assigned previously created /boot partition and other volumes to corresponding mount points.
1- I clicked sda1 under "Unknown" section, set /boot as mount point and ext4 as file system on the right pane. I then clicked "Reformat" and "Update Settings".

2- I clicked on "EFI System Partition" (sda2, 100 MB) disk, set /boot/efi as mount point and clicked "Update Settings". In this step, the disk must be added without turning "Reformat" option on. This is the last point to pay attention in this whole setup. Otherwise, Windows has to be reinstalled. Whereas, Anaconda rarely allows a partition to be added without reformatting.
3- Other partitions are mounted to corresponding mount points. For this, "Reformat" is checked and the corresponding mount point is entered into the text box. File system depends on personal preference. I usually prefer ext4 for /var and xfs for the rest. I explained my opinions on Btrfs in a separate section at the end of the article. Following screenshot shows all disks and their mount points.

After setting up the disks and creating a user with admin rights, the installation begins. The installer recognizes existing Windows installation and adds it to GRUB menu automatically. Nice feature! When I installed Centos 7 last time, there was no such feature and I had to add Windows entry to grub.cfg manually.
After all steps are done and machine is restarted both OSes are ready to use.

Appendix: Btrfs
Since Fedora 33 provides btrfs as the default file system and I install Fedora to bare metal, I researched on btrfs a lot.
First of all, btrfs contains a lot of features compared to ext and xfs. A disk partition can be saved exactly as it is thanks to the snapshot feature. This is really handy. Since this feature isn't available in ext, it must be used in LVM volumes for snapshot. And thanks to the subvolumes, there is no need to partition the disk anymore with btrfs. This has another advantage: btrfs supports deduplication. Files are split in chunks and chunks with identical hashes are stored as single copy. Using the whole disk as a single btrfs partition increases deduplication ratio by expanding the file/data pool and it is still possible to manage individual directories by using subvolumes. Finally, it replaces RAID which is known with its restrictive nature on disk sizes and allows users to create storage groups with different sized disks. While this feature may not mean much for desktop users, it offers way more flexibility to storage admins.
On the other hand, RedHat removed btrfs support from the kernel about three years ago. At that time, SuSe was recommending btrfs, but I don't know their stance, now. I have thought, btrfs was not mature at that time but there are rumors that there may be commercial concerns behind RedHat's decision: Oracle allergy could be why...
I still think, btrfs is the future technology and it's way more stable now, but it is still too early to use it in production, even if RedHat had supported it. One reason for this is, that I had migrated to FAT32 as soon as it is available and I had not been able to find any proper data recovery program when I had lost some data. That's why, I still keep a distance from new file systems. Another reason is the burden of migrating existing data. By the way, Phoronix's tests will give an idea about its performance:
On desktop, I simply did not want to use btrfs because of my habits. In my personal computer, I am using a partitioning scheme similar to above. For me, it is a matter of efficiency due to the deduplication, when I continue to use this scheme with btrfs. According to Btrfs FAQ, using a single btrfs partition is recommended for write optimization but not deduplication. Free space calculation is also confusing with btrfs. For example, a forgotten snapshot can take up a significant amount of space or a 120 GB disk may contain files of 300 GB with deduplication and still have 40 GB free space. The last reason is that I know LVM commands well since I have been using them for years and I did not want to leave my comfort zone for btrfs.
Is a /boot partition always necessary?
What's your recommendation on drive partitioning ... ?
Having this said, as of Fedora 33, the default file system is now btrfs. At the end of this article, I wrote a section about btrfs. I will not use btrfs for this installation and explained the reasons at the end.
Creating the Virtual Machine
I used VMware Workstation v15.5 for virtualization (not sure if VirtualBox can run EFI properly). The VM must have at least two cores and more than 2 GB of RAM, otherwise weird errors might show up. In Vmware ESXi Lab article, I explained how to create a VM, so I will only mention the some steps.
 I created the machine with "Custom (advanced)" option and selected "I will install the operating system later". Guest operating system will be Windows 7 x64. This enables UEFI option at "Firmware type" screen (next figure). In case UEFI option is greyed out here, open the .vmx file after the machine is created and change the line starting with firmware as firmware = "efi". If this line doesn't exist, add the whole statement, close vmware workstation window and reopen it. For Win10, "Windows 10 x64" must be selected. As far as I know, there is no 32-bit Win 10 (Edit: there is). I did not understand, why there are "Windows 10" and "Windows 10 x64" options in VMware.
I assigned two cores (or two sockets) as CPU and 3072 MB as RAM. 2 GB is minimum recommended for Win 7, as long as it does not exceed the physical memory available (blue triangle), the more memory the VM has, the more reliable it runs. Network connection will be NAT and IO controller "LSI Logic SAS". Even though Win 7 supports "LSI Logic", too, Win 10 does not (vmware doesn't allow you to select). The wizard recommends NVMe disk for Win 10 but since I don't know the impact on this configuration, I chose SCSI (btw. Fedora can be installed on NVMe disk). I created a 120 GB SCSI disk. I did not check "Allocate all disk space now" because I don't have that much free space on my physical disk. At this point, I completed the wizard and created the machine.

Partitioning the Disk
Partitioning is the first thing to give attention. I have the following options:
- KDE partition manager on Fedora KDE
- "disks" on Fedora Workstation or spins like Cinnamon (I couldn't manage to use this)
- gparted: This comes with ubuntu live. I can either start the VM with ubuntu or install gparted on Fedora using sudo dnf install gparted command.
- fdisk: fdisk comes with all linux distros and its current version can also create GPT partitions.
 Since Fedora 32, KDE is running problematically in VM. Therefore, before booting the VM with KDE, 3D graphics acceleration must be turned off in VM display settings (Source: KDE spin issues in VMWare).
The problem with disk partitioning is that Windows setup wants to create an EFI partition by itself. Therefore, it is necessary to leave approx. 256 MB unpartitioned space on disk. 128 MB of this, is EFI partition. There is another 100 MB hidden partition created by the setup, supposedly used for temp files or as recovery partition. If only 128 MB is left, 100 MB of this will be used for EFI partition and the hidden partition will not be created. For Win 10 installation, a 100 MB EFI partition is created with a 16 MB hidden partition. So, leaving 128 MB for Win 10 is enough.
 To partition the disk, I booted the VM with ubuntu and started gparted (using ubuntu is optional, check the third item above. I explained same procedure with KDE partition manager below). I made sure that the correct disk is selected at the top right (especially for physical machines). First, I created a 'gpt' type partition table by clicking Create Partition Table item under Device menu. Then I right-clicked on the gray rectangle representing the empty disk and clicked New afterwards. I gave 1024 as "New size" and created first partition.

I pressed the green tick button and wrote the partitions to the disk. By the way, while creating the partitions, the order is important. For example, if I had created the third partition before the second, the third partition (40 GB) would be sda2 since it would be in the second entry on GPT, and the second partition (78.75 GB) would be sda3. It is quite confusing that the partitions are numbered according to their entries on GPT instead of their location on disk.
After partitioning, I created volume groups and logical volumes for linux. I run following commands on console:
sudo su -
pvcreate /dev/sda2
vgcreate vg_fedora /dev/sda2
lvcreate -L 30G -n lv_root vg_fedora
lvcreate -L 25G -n lv_home vg_fedora
lvcreate -L 2G -n lv_swap vg_fedora
lvcreate -L 6G -n lv_tmp vg_fedora
lvcreate -L 10G -n lv_var vg_fedora
pvcreate /dev/sda2
vgcreate vg_fedora /dev/sda2
lvcreate -L 30G -n lv_root vg_fedora
lvcreate -L 25G -n lv_home vg_fedora
lvcreate -L 2G -n lv_swap vg_fedora
lvcreate -L 6G -n lv_tmp vg_fedora
lvcreate -L 10G -n lv_var vg_fedora
I created this template for my own needs and left 5.75 GB free space in volume group intentionally, to assign in case it's needed in future. If I wanted to add all remaining free space to lv_var, I should run:
lvcreate -l 100%FREE -n lv_var vg_fedora
Same thing can be done using KDE partition manager: I boot the VM with Fedora KDE, start partition manager from Applications -> System -> KDE partition manager and select the disk to partition from the left pane. Then, I click "New Partition Table" button above and select "GPT". I create a 1024 MB partition first (like above), then the second partition with 256 MB of preceding unpartitioned space and followed by 40960 MB of unpartitioned space and finally, third NTFS partition in the remaining space.

Fully partitioned disk can be seen above. I press Apply to write this to disk and create logical volumes for linux with the commands in the box above.
Installing Operating System #1: Windows
The order of installation of OSes is the second important point to give attention. I haven't tried with Windows 10 but Win XP and Win 7 always overwrite existing boot loader. GRUB will be overwritten with Windows MBR code if linux is installed first. Therefore I have to start with installing Windows.
I booted the VM with Win 7 DVD. In the meantime, I disconnected from network. I suppose, it tries to connect to internet for updates during the installation, which takes time. For physical installation, image file can be written to USB stick with UNetbootin or UUI. Additionally, while installing Win 7 to bare metal, my IR mouse and keyboard, which are normally recognized by Win 7 successfully, caused setup to crash. Therefore, it is better to remove them before installation.

I completed the installation by selecting "Custom (Advanced)" at the "Type of installation" step and selecting the third partition at the disk selection step.

I won't go into details of steps such as username, password etc.
During Windows 10 installation, product key will be asked. I skipped this by pressing "I don't have a product key". Those, who are considering to buy a license, need to choose a suitable edition at next step. The editions ending with "N", don't contain some programs as per EU laws, but it's nearly impossible to find license for them. I chose Win 10 Pro, but it doesn't matter for me because in fact, I am just installing a temporary VM. Like Win 7 installation, "Custom Install" needs to be selected and the third partition will be the installation target.

And again, I will not go into details, as the rest are just personal settings.
Installing Operating System #2: Linux
Before everything, there is one thing to be careful about physical machines. Linux must be booted in 64-bit UEFI mode. How will this happen?
For example, GRUB menus in Fedora are a little different between 32 and 64-bit modes. If the menu is in color, it is IA32, if it's without color then it is x64 mode.
|
|


When I plug the USB stick with Fedora into my computer and restart, this USB disk appears twice in BIOS boot options. The right option can be found by trying or opening EFI shell and running BOOTX64.EFI manually. In VMware, it always boots in to correct mode without doing anything.
As it can be seen from the images above, I prefer KDE. Once Fedora has booted, just click "Install to Hard Drive" for installation. The best thing with live distro setups is being able to run other programs in the background during installation and if you have more than one monitor, you can browse the Internet at the same time while installation is running on the other monitor. By the way, I had turned the network connection off before Windows installation. This time, I will turn it on. Otherwise, I will need to configure network manually after the installation.

1- I clicked sda1 under "Unknown" section, set /boot as mount point and ext4 as file system on the right pane. I then clicked "Reformat" and "Update Settings".

2- I clicked on "EFI System Partition" (sda2, 100 MB) disk, set /boot/efi as mount point and clicked "Update Settings". In this step, the disk must be added without turning "Reformat" option on. This is the last point to pay attention in this whole setup. Otherwise, Windows has to be reinstalled. Whereas, Anaconda rarely allows a partition to be added without reformatting.
3- Other partitions are mounted to corresponding mount points. For this, "Reformat" is checked and the corresponding mount point is entered into the text box. File system depends on personal preference. I usually prefer ext4 for /var and xfs for the rest. I explained my opinions on Btrfs in a separate section at the end of the article. Following screenshot shows all disks and their mount points.

After setting up the disks and creating a user with admin rights, the installation begins. The installer recognizes existing Windows installation and adds it to GRUB menu automatically. Nice feature! When I installed Centos 7 last time, there was no such feature and I had to add Windows entry to grub.cfg manually.
After all steps are done and machine is restarted both OSes are ready to use.

Appendix: Btrfs
Since Fedora 33 provides btrfs as the default file system and I install Fedora to bare metal, I researched on btrfs a lot.
First of all, btrfs contains a lot of features compared to ext and xfs. A disk partition can be saved exactly as it is thanks to the snapshot feature. This is really handy. Since this feature isn't available in ext, it must be used in LVM volumes for snapshot. And thanks to the subvolumes, there is no need to partition the disk anymore with btrfs. This has another advantage: btrfs supports deduplication. Files are split in chunks and chunks with identical hashes are stored as single copy. Using the whole disk as a single btrfs partition increases deduplication ratio by expanding the file/data pool and it is still possible to manage individual directories by using subvolumes. Finally, it replaces RAID which is known with its restrictive nature on disk sizes and allows users to create storage groups with different sized disks. While this feature may not mean much for desktop users, it offers way more flexibility to storage admins.
On the other hand, RedHat removed btrfs support from the kernel about three years ago. At that time, SuSe was recommending btrfs, but I don't know their stance, now. I have thought, btrfs was not mature at that time but there are rumors that there may be commercial concerns behind RedHat's decision: Oracle allergy could be why...
I still think, btrfs is the future technology and it's way more stable now, but it is still too early to use it in production, even if RedHat had supported it. One reason for this is, that I had migrated to FAT32 as soon as it is available and I had not been able to find any proper data recovery program when I had lost some data. That's why, I still keep a distance from new file systems. Another reason is the burden of migrating existing data. By the way, Phoronix's tests will give an idea about its performance:
- Linux 5.0 FS Benchmarks: Btrfs vs. EXT4 vs. F2FS vs. XFS (Jan '19)
- Linux 5.4 EXT4/XFS/Btrfs RAID Performance On Four HDDs (Dec '19)
- Linux 5.5 SSD RAID Benchmarks Of Btrfs/EXT4/F2FS/XFS (Jan '20)
- XFS/EXT4/Btrfs/F2FS/NILFS2 Performance On Linux 5.8 (July '20)
On desktop, I simply did not want to use btrfs because of my habits. In my personal computer, I am using a partitioning scheme similar to above. For me, it is a matter of efficiency due to the deduplication, when I continue to use this scheme with btrfs. According to Btrfs FAQ, using a single btrfs partition is recommended for write optimization but not deduplication. Free space calculation is also confusing with btrfs. For example, a forgotten snapshot can take up a significant amount of space or a 120 GB disk may contain files of 300 GB with deduplication and still have 40 GB free space. The last reason is that I know LVM commands well since I have been using them for years and I did not want to leave my comfort zone for btrfs.